When you see the Petzl Chicane

IMG_20191108_214954.webp
IMG_20191108_214954.webpIMG_20191108_214855.webpIMG_20191108_214915.webpIMG_20191108_215036.webpIMG_20191108_215150.webpIMG_20191108_214954.webpIMG_20191108_214855.webpIMG_20191108_214915.webpIMG_20191108_215036.webpIMG_20191108_215150.webp

None of these measurements need be adhered to exactly I wouldn't think but they are working and I wouldn't deviate from them much without a reason to do so.
 
That is slightly wider than a standard #60 chain link. I think it could be made slightly wider.
 

Attachments

  • IMG_20191108_215352.webp
    IMG_20191108_215352.webp
    261 KB · Views: 6
IMG_20191108_215426.webp

Next two are attempting to show that the bottom arm pivot point is elevated and it is important in applying correct frictionIMG_20191108_215533.webpbyIMG_20191108_215539.webp

Also there are sleeve inserts passing through the side plates that the bolts go through. It helps to bind the two plates together.
 
This top arm works just as well and has more metal around the bolt for strength and it is lighterIMG_20191108_221052.webpIMG_20191108_221052.webp
 

Attachments

  • IMG_20191108_221044.webp
    IMG_20191108_221044.webp
    256.1 KB · Views: 7
  • IMG_20191108_221117.webp
    IMG_20191108_221117.webp
    120.1 KB · Views: 7
All done. Let me know if I missed anything.

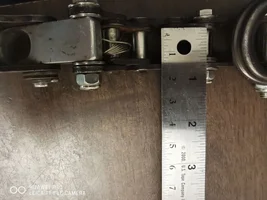
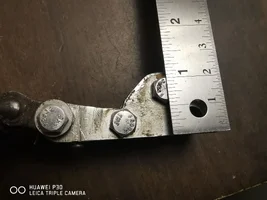
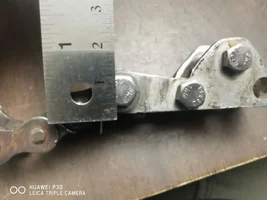
The top arm spring needs to be moved up to the top arm somehow. As it is too much torque causes the lower link to move in such a way as too create tending drag.

Either that or create the initiating friction differently.

Surveyor explained another way too me in a previous post but I cldn't figure it out.
 
Back
Top Bottom