Documenting my hand-sewn eye process

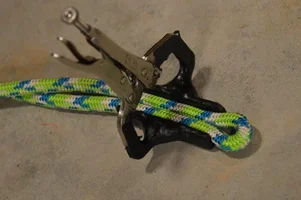
Makes sense, Richard. Maybe I can find someone to weld plates on a pair of welder's pliers (which would be nice so I can stitch on the couch instead of standing over my work at the bench vice. I've got a lot of crafting to do in the next little bit, but I hope to be sending something off to be tested in the next couple of weeks. If I weren't so cheap, I'd have already sent my snaps in to have a lanyard machine stitched. Wish tritech was hand spliceable.
 
when ya'll go for the second or third pass, is it all one long continuous thread, or do you do each pass seperately? how do you terminate the sitching?

for compression while stitching, could i just use a bench vice? can you compress it too much?

I do a continuous length of thread for all 3 passes (it's a pain to manage all that thread during the first pass) but you could certainly do separate pieces of thread, previous poster in this thread used a separate piece of thread for each pass. I start the stitching at the eye throat and terminate with a square knot on the end of the stitched area away from the eye. I leave long tails on the square knot and pull them through the cordage to the other side with a large sewing needle or awl, trim to about 3/8" inch and melt with a lighter to create little round molten ends which I mash with my thumb against the cordage. With the waxed thread the square knot is stable but finishing the ends that way really locks it down. Once the shrink tubing is on nothing moves.
-AJ
 
Thx Richard, I tend to over build, I don't like anxiety ;-) I like using the thin electrical tape to hold everything in place for the basting pass. I can take it off as the first basting stitch pass moves along and everything stays tight. As far compressing too tight goes, you use your judgement, for example if you can't pass needle through, it's too tight ;-) On the first eyes I made I had more problems with making the eye too tight. When the eye is too tight the weave on the cover starts to separate and you can see the core through the weave, that's too tight. It's like a lot of things, you have to make a few and find out what's what.
-AJ
 
Last edited:
Check this photo out. I formed the eye around a carabiner to the size I wanted, with the carabiner still in place I taped the throat with the green tape. I took the carabiner out and flattened the eye down with the red tape to "capture" the eye size. Then I took the green tape off and pre-compressed the area to be sewn using 3 C clamps and the green tape.

What you see in the photo is after I took off the compressed tape wrap nearest the eye and started the first pass basting stitch.

9821973356_cf1716d62b_c.jpg
 
Last edited:
Moss, how would you feel about stitching an eye in escalator line with the waxed polyester thread that comes with the speedy stitcher?

would you ever consider making a video of your stitching process?
 
has anyone considered hand stitching a slaice?

I have, just haven't got around to it. I put this on the other end of my ropes, very strong but cover only, not for life support, great though for hauling a rope up and getting through the tight spaces.

I take out 3" of core, stuff a folded piece of webbing in and sew it down two parallel rows with the Speedy Stitcher. The cross stitching on the right side end of the stitching grabs into the end of the core to keep a space from developing there under the cover over time.

9822073994_b64634fe3b_c.jpg


Finish with some adhesive lined shrink tubing otherwise in past versions the cover end starts to fray even if you melt it.

9822115556_3497203158_c.jpg


thx for paying attention this far ;-) -AJ
 
Moss, how would you feel about stitching an eye in escalator line with the waxed polyester thread that comes with the speedy stitcher?

would you ever consider making a video of your stitching process?

I would go heavier thread with the Escalator since there will be situations where everything will be on the eye, as opposed to hitch cord where load is shared between two eyes. Check out Oceans post earlier in this thread, I think he mentioned what thread he used. I would definitely wax your thread if you use something other than what comes with the stitcher. Makes it much easier to handle, increases tensile strength, and if you use bee's wax, smells dam nice ;-)

I have another batch of stitching to do, I'll see what I can do. I have to work too ;-) so time is a challenge for doing video production these days.

Thx, -AJ
 
Last edited:
Have you considered a dyneema thread so you can get the same stitch density but it would be significantly stronger?

Also, moss, where do you get the tex 400 .9mm thread? When I google it, it comes up as beading thread
 
Last edited:
Have you considered a dyneema thread so you can get the same stitch density but it would be significantly stronger?

There has been discussion about using the aramid threads, there is the possibility that they'll cut the polyester rope fibers. Basically the 400 thread and the 415 that gmcttr is using are quite strong for the use. Look at the break numbers Oceans was getting on his stitched eyes.
-AJ
 
I've used c lon from belomodo. And also some 415 from thread exchange. The threads are different. C lon has seperate threads that are bonded together and 415s strands are mashed todether by wax but not twisted. The sites say the tensile is close to the same but the 415 seems smaller in width. I prefer the 415 It seems to pass through the textile better. I really like the size 277 to use on hitch cords (8mm) and still has a tensile of 45 lbs. I also like the 7×3×160 needle better its about the same size as the #5 needle you can get with the stitcher.
 
C-Lon 400 on left, waxed 415 polyester from thread Exchange on the right...

IMG_5188 (Small).webp

Waxed 415 with some surface wax removed shows that it is a twisted thread...

IMG_5191 (Small).webp
 
Last edited:

New threads New posts

Kask Stihl NORTHEASTERN Arborists Wesspur TreeStuff.com Teufelberger Westminster X-Rigging Teufelberger
Back
Top Bottom