- Location
- Pittsburgh, PA
gear junkie,
Good point on the cost of cord replacement and compactness of hitch on HH.
I still struggle with tying setting and re-tying after loading, then doing it al over again the next time I install the HH.
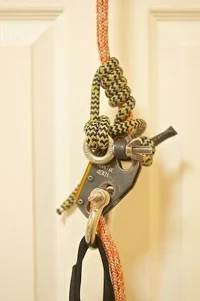
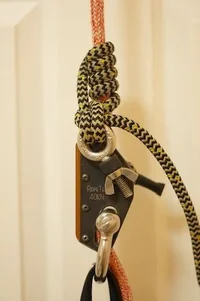
I came up with using a 3/8 SS Lifting Eye - 1-1/2" Shank,1200# WL and Wing Nut on one side of the dog bone and using an Anchor bend. To Install & Remove Rotate the shank 90 Degrees and Wing nut will turn loose. Once set this can be re -installed without adjustment.
Good point on the cost of cord replacement and compactness of hitch on HH.
I still struggle with tying setting and re-tying after loading, then doing it al over again the next time I install the HH.
I came up with using a 3/8 SS Lifting Eye - 1-1/2" Shank,1200# WL and Wing Nut on one side of the dog bone and using an Anchor bend. To Install & Remove Rotate the shank 90 Degrees and Wing nut will turn loose. Once set this can be re -installed without adjustment.
") (just being humorous, or trying so hope you don't take offense)
(just being humorous, or trying so hope you don't take offense)