Bleeding Hi-ranger bucket contols

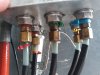
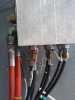
im having the same problem nothing is coming from the lines on the upper controls do you have a manual or info can't find anything online

I do not have a manual. From what you've described, have you taken the line off at the upper controller , and you do not get any fluid out of it? Just one function or all 6?
 
Mine has an air pressure controlled 'dead man' switch that was supplied air from a pencil lead sized tubing. It connects to the pistol grip.
 
It appears to have the low pressure system. basically the low pressure physically pulls and pushes your lower levers to allow the boom to move.

At this point I'd fly the boom up and down a few times to try and dislodge any trapped air. I remember it was very frustrating for me when I did mine, but a relief once I got the first system to work because I realized I was in fact bleeding it correctly. As you mentioned there is not much info out there on this procedure. I was even happy when I found that when I tried to rotate right that it actually went left, bc that's an easy fix once its finally to the point of operating.

If memory serves me correctly I spent a week of evenings bleeding my system after replacing all of the tubing. It was definitely 3-4 evenings if it wasn't a week. I also went through nearly 5 gallons of hydro fluid bleeding all of the lines.
What type of tubing did you use I need to replace all of my tubing found some called naraflow type h i believe that may work
 
I do not have a manual. From what you've described, have you taken the line off at the upper controller , and you do not get any fluid out of it? Just one function or all 6?
It gets a little coming out the supply line i need to replace the tubing it was leaking from where someone pieced together with air brake tubing what kind of tubing do i need to get i found some online called naraflow type h 1/4"
 
It gets a little coming out the supply line i need to replace the tubing it was leaking from where someone pieced together with air brake tubing what kind of tubing do i need to get i found some online called naraflow type h 1/4"

I let the hydraulic shop order the tubing for me to ensure that I had the correct tubing, so I'm unsure what the brand was. Just a heads up, pulling this tubing through the boom is quite the chore, at one point I was on an extension ladder pushing the tubing in the elbow while someone pulled on the other end and we could only move it one inch at a time. I also used electrical cable lubricant to help it slide in. You may choose to just let the hydro shop handle it for you unless you want a challenge.

One other thing I found out while doing mine, I had went through and taped my new bundle of tubing about every foot or so to keep the bundle straight and tight only to find that the channel in the boom is oblong and the round bundle that I made would not fit in the boom. If you wish to tape your bundle to keep it all in line with each other, don't bother taping more than about every 5 feet as you'll be pulling the tape off as it goes in the boom.
 
Hello. I found a few pics of when I rebuilt this, hopefully they will help. View attachment 66519 I'm not sure how closely you've looked at yours, but this component is on the bottom where the hydraulic tubing connects. View attachment 66520 This is the main body, looking at the top side. You can see the linkages next to the one already disassembled, this linkage is shown in the next photo. View attachment 66521

All seals and o-rings and locations are marked in the pictures, and all 6 linkages are identical.
How do you get the seal out of the one in the 2nd picture?
 
98 highranger 80" So today the upper boom goes up but not down. All other functions work . Hit the dead man switch on the main lower hydrolic controls on the turn table and it goes down. The upper hydrolic function on the pistol grip will not lower the upper boom. The upper control was rebuilt a month agao. I dont see any air in the lines. But the main question i have is does anyone kno which 1/4"line on the bottom of the pistol grip houseing is the upper boom down function line. I want to check for flow but it seems the pistol grip controls may be plugged on the down function. Any ideas are appreciated. Yes I bleed all controls on the main hydrolic controls. No air found. Lever works fine when using the deadman switch. Just not at the pistol grip control. Thanks
 
98 highranger 80" So today the upper boom goes up but not down. All other functions work . Hit the dead man switch on the main lower hydrolic controls on the turn table and it goes down. The upper hydrolic function on the pistol grip will not lower the upper boom. The upper control was rebuilt a month agao. I dont see any air in the lines. But the main question i have is does anyone kno which 1/4"line on the bottom of the pistol grip houseing is the upper boom down function line. I want to check for flow but it seems the pistol grip controls may be plugged on the down function. Any ideas are appreciated. Yes I bleed all controls on the main hydrolic controls. No air found. Lever works fine when using the deadman switch. Just not at the pistol grip control. Thanks


I've forgotten off hand which line it was on mine, however if you remove the black boot below the pistol grip you should be able to see the linkages and see which two move for that particular function. The up and down linkage both move at the same time, working together to make the movement happen. The lines connect directly below the linkages, allowing you to figure out which ones should be flowing.
 
Thank you. Do u kno how the pressure adjustments work. Where the 1/4" lines come out of the bottom of the pistol grip hyd control. For each function. If u loosen the line or remove it , where the line attaches the whole valve/ unit of some type of pressure adjuster turns. All 6 are at different levels. Some have 2 threads visible some have 3 or 4. So I dont think u just turn them in till they stop. But I am curious because I am going to try to rebuild the controller or clean the upper stick down port. But haveing each one of those at different levels makes me wonder why. If I could find a break down or a repair man . Or just a pic of how it work or the parts would make life way more simple. It's hard to find any info on it. and ofcourse the original manuals wer kept by the original owner. Any help is greatly appreciated. Or if u think of something I havent even the simple little things matter so any tips or tricks are always helpful. Thanks everyone .I'll attach pics tomorrow!
 
Thank you. Do u kno how the pressure adjustments work. Where the 1/4" lines come out of the bottom of the pistol grip hyd control. For each function. If u loosen the line or remove it , where the line attaches the whole valve/ unit of some type of pressure adjuster turns. All 6 are at different levels. Some have 2 threads visible some have 3 or 4. So I dont think u just turn them in till they stop. But I am curious because I am going to try to rebuild the controller or clean the upper stick down port. But haveing each one of those at different levels makes me wonder why. If I could find a break down or a repair man . Or just a pic of how it work or the parts would make life way more simple. It's hard to find any info on it. and ofcourse the original manuals wer kept by the original owner. Any help is greatly appreciated. Or if u think of something I havent even the simple little things matter so any tips or tricks are always helpful. Thanks everyone .I'll attach pics tomorrow!


If I remember correctly, there is only one adjustment for pressure at least on my system. ours could vary a little bit. Are the 6 adjustments that your looking at thumb screws? Pics would be helpful.
 
If I remember correctly, there is only one adjustment for pressure at least on my system. ours could vary a little bit. Are the 6 adjustments that your looking at thumb screws? Pics would be helpful.
 

Attachments

  • 20200623_164918.jpg
    20200623_164918.jpg
    264 KB · Views: 21
  • 20200623_164925.jpg
    20200623_164925.jpg
    303 KB · Views: 20
  • 20200623_172821.jpg
    20200623_172821.jpg
    391.9 KB · Views: 20
So the last pic of the valve was the problem the tiny orifice was clogged with a peace of dirt of some sort. The 1/4" line attaches to it and it screws into the bottom of the main housing. I think it also adjusts the controll pressure. And the one u are thinking of controls the Main feed pressure to the controls. Its fairly simple to repaire or clean. That tiny hole in the valve is so small that almost anything could plug it. All other functions worked just not the maine stick down. I put it together. I Held the deadman switch on and bleed the lower thumb screw on the center lower control on the turntable. Or main hyd valve bank for maybe a minute till clear fluid came out. Tighten the thumb screw and hopped in the bucket and all the well. It goes up and down with ease now. Oh before I forget about 2 threads showing on the 6 control lines on the pistol grip controler.the lower side . Seems to be the right pressure. If anyone takes out 1 of the 6 tumb screws on the Main valve body for bleeding purposes. Theirs a tiny ball behind the screw so u only need to turn it out 1 turn. U do not have to remove it. If u loose the ball u will have to find a screw to plug the draine port or it will leak fluid out of the threads of the thumb screws. Thanks for all the help. It was greatly appreciated.
 
So the last pic of the valve was the problem the tiny orifice was clogged with a peace of dirt of some sort. The 1/4" line attaches to it and it screws into the bottom of the main housing. I think it also adjusts the controll pressure. And the one u are thinking of controls the Main feed pressure to the controls. Its fairly simple to repaire or clean. That tiny hole in the valve is so small that almost anything could plug it. All other functions worked just not the maine stick down. I put it together. I Held the deadman switch on and bleed the lower thumb screw on the center lower control on the turntable. Or main hyd valve bank for maybe a minute till clear fluid came out. Tighten the thumb screw and hopped in the bucket and all the well. It goes up and down with ease now. Oh before I forget about 2 threads showing on the 6 control lines on the pistol grip controler.the lower side . Seems to be the right pressure. If anyone takes out 1 of the 6 tumb screws on the Main valve body for bleeding purposes. Theirs a tiny ball behind the screw so u only need to turn it out 1 turn. U do not have to remove it. If u loose the ball u will have to find a screw to plug the draine port or it will leak fluid out of the threads of the thumb screws. Thanks for all the help. It was greatly appreciated.
Congratulations on the fix.
 
Just to follow up, I have since gotten this repaired and wanted to share what I did in case anyone else needs the info on their truck. I continued to try and bleed the controls like I explained above and was not getting anywhere, so I decided to rebuild the pistol grip controller up by the bucket, assuming that if air was getting into the system it had to be there as the only connections were up at the bucket controls and down at the bottom controls. The controller rebuild was fairly simple, there are 6 functions and each one has 4 o-rings in it to replace. The job took me about 3 hours but could have been done quicker. Once reassembled I continued the bleeding process explained above and managed to get all 6 functions working again.

Edit: forgot to mention, to rebuild the pistol grip controller only cost $8, well worth it to go ahead and rebuild. Especially if your having trouble bleeding the lines.
Where did you buy the rebuild kit for your upper controls? My truck has the air line and i was told that it has a diaphram and im hoping to be able to get that with a rebuild kit.
 
Where did you buy the rebuild kit for your upper controls? My truck has the air line and i was told that it has a diaphram and im hoping to be able to get that with a rebuild kit.

I did not buy an actual kit. I disassembled the control unit and took the o-rings and seals in and had them matched.


Air line being for the safety switch?
 
I did not buy an actual kit. I disassembled the control unit and took the o-rings and seals in and had them matched.


Air line being for the safety switch?
Im kinda new to working on these but i believe that is what the air line is for. i hear an air leak and my trigger doesnt do anything. Im having issues when i turn the controls stop working completely and wont do anything until i reset the pto. ive bled lots of air out and its gotten better but still does it from time to time. im just tryin to fig out whats causing this
 
Im kinda new to working on these but i believe that is what the air line is for. i hear an air leak and my trigger doesnt do anything. Im having issues when i turn the controls stop working completely and wont do anything until i reset the pto. ive bled lots of air out and its gotten better but still does it from time to time. im just tryin to fig out whats causing this


It should be air in the smallest tubes that go to the trigger in the bucket and a palm switch at the ground controls. The other 6 tubes are hydraulic, if you have air in them then that is likely the issue vs the air lines. Unless of course you have multiple issues which does complicate troubleshooting.


I haven't had to do anything to the air lines myself, but I can't imagine any way to bleed air out of those, as that's the intentional product in those lines.
 
What im curious about the airline is i can hear leaking coming from the upper handle controls and i heard there was a diaphram in there but im not sure. i have bled a bunch of air from the lines and it seems to work better now but still acts up here and there.
 

New threads New posts

Back
Top Bottom