I wish I had made a video so ya'll could get a laugh. I built a homemade unit and fired it the first time today and got quite a shock. Loaded with a 16oz weaver bag (a 15oz Forrester bag will NOT fit in a 1.5" tube) and 150lb's pressure. At a 60deg angle it shot about 400' (no throw line attached) across the road, blew the whole unit off my shoulder and crashed to the ground breaking the reducer nipple(PVC) off right in front of the valve. Talk about feeling like a dumbass!!!!!! Reckon I'll be making some kind of pistol grip for the forearm of this elephant gun.

Navigation
Install the app
How to install the app on iOS
Follow along with the video below to see how to install our site as a web app on your home screen.
Note: This feature may not be available in some browsers.
More options
You are using an out of date browser. It may not display this or other websites correctly.
You should upgrade or use an alternative browser.
You should upgrade or use an alternative browser.
Homemade APTA
- Thread starter NailerB
- Start date
hseII
Participating member
- Location
- United States
I wish I had made a video so ya'll could get a laugh. I built a homemade unit and fired it the first time today and got quite a shock. Loaded with a 16oz weaver bag (a 15oz Forrester bag will NOT fit in a 1.5" tube) and 150lb's pressure. At a 60deg angle it shot about 400' (no throw line attached) across the road, blew the whole unit off my shoulder and crashed to the ground breaking the reducer nipple(PVC) off right in front of the valve. Talk about feeling like a dumbass!!!!!! Reckon I'll be making some kind of pistol grip for the forearm of this elephant gun.
Or you could just buy one to Skip all that rehabilitation & living a life without your vision or use of your right side: your choice.
Sent from my iPhone using Tapatalk Pro
Jehinten
Been here much more than a while
- Location
- Evansville
I used to use a homemade PVC launcher until I made myself put it away and practice throwing. 150 would be way to much pressure, I think the most I used was 80 and I could set a line 70 feet up from 130 feet away from the base of the tree. Of course different designs would lead to needing more or less pressure for the same performance.
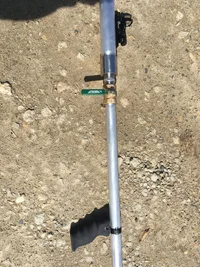
The pressure side is schedule 40 steel pipe(bursting pressure 6100 psi/working pressure 760 psi) going to a brass 1" butterfly valve. From there forward it goes from 1" nipple to 1.5" schedule 40 pvc which has a pressure rating of 330 PSI. The lowest pressure stated is over twice the pressure I loaded.
Aluminum parts do nothing but save a little weight, and I'll bet that the difference making the pressure chamber and barrel from aluminum compared to steel and PVC are small. I'm only carrying it from the truck to the tree. If a few ounces make that much difference, I probably shouldn't be be climbing.Do away with the plastic parts. Go aluminum pipe and galvanized fittings. If you are in an agricultural area, a sprinkler supply place will do the threading for minimal $$.
Sent from my iPhone using Tapatalk
Or you could just buy one to Skip all that rehabilitation & living a life without your vision or use of your right side: your choice.
Sent from my iPhone using Tapatalk Pro
What engineer signed off on this?
- Location
- Retired in Minneapolis
YOu may be a better arbo than an engineer.
When PVC fails it turns into sharp shreds. Aluminum is likely to just split
and..you took your first shot with 150 psi?! Never heard the admonition about walking before you run?
When PVC fails it turns into sharp shreds. Aluminum is likely to just split
and..you took your first shot with 150 psi?! Never heard the admonition about walking before you run?
hseII
Participating member
- Location
- United States
What engineer signed off on this?
With an actual APTA, the materials used to assemble are rated for the pressure.
PVC is not.
Sent from my iPhone using Tapatalk Pro
Mark De La Cruz
New member
- Location
- Tampa
Thought about making one out of galvanize piping but, my Big Shot has been just right for me so far.I wish I had made a video so ya'll could get a laugh. I built a homemade unit and fired it the first time today and got quite a shock. Loaded with a 16oz weaver bag (a 15oz Forrester bag will NOT fit in a 1.5" tube) and 150lb's pressure. At a 60deg angle it shot about 400' (no throw line attached) across the road, blew the whole unit off my shoulder and crashed to the ground breaking the reducer nipple(PVC) off right in front of the valve. Talk about feeling like a dumbass!!!!!! Reckon I'll be making some kind of pistol grip for the forearm of this elephant gun.
Joe Bisping has a video on the old You Tube concerning the DIY throw ball cannon.
Bucknut
Carpal tunnel level member
Here’s my build. (Full credit to Tom Hoffmann. It was his idea to elongate the pressure chamber which allows the use of either the “bazooka” firing position or the “mortar” position).
Schedule 40 6061 aluminum pressure chamber and barrel with SS end cap and reducer. 1” butterfly valve. Used a scope ring adapter with a picatinny rail and inverted it to attach the pistol grip, which is actually a combat foregrip for an AR.
For the reflex sight I just bought a small section of picatinny rail with a curved bottom and attached it to the barrel with 2 part epoxy. (To those of you who think a red dot reflex sight on a bean bag launcher might be a little overkill.... you are 100% correct. But it looks much cooler.)


I think Mr. Hoffman is onto something with the “mortar” firing position. He has a wonderful YouTube video where he explains this, but this firing position eliminates recoil and thereby increases distance. Since most of my shots are fairly vertical this appealed to me.
Schedule 40 6061 aluminum pressure chamber and barrel with SS end cap and reducer. 1” butterfly valve. Used a scope ring adapter with a picatinny rail and inverted it to attach the pistol grip, which is actually a combat foregrip for an AR.
For the reflex sight I just bought a small section of picatinny rail with a curved bottom and attached it to the barrel with 2 part epoxy. (To those of you who think a red dot reflex sight on a bean bag launcher might be a little overkill.... you are 100% correct. But it looks much cooler.)
I think Mr. Hoffman is onto something with the “mortar” firing position. He has a wonderful YouTube video where he explains this, but this firing position eliminates recoil and thereby increases distance. Since most of my shots are fairly vertical this appealed to me.
Attachments
climbstihl
Branched out member
- Location
- Germany
For anybody looking to make their APTS more effecient, whether homemade or storebought, you can make the trigger rubber powered so it snaps open extremely quickly, releasing all the air simultaneously. Look up Jörg Spraves homemade arrow launcher on Youtube for details.
New threads New posts
-
test
-

-
-
 Fruit tree holding on by a thread, client wants to get another year out of it. Thoughts?
- Started by climbingmonkey24
- Replies: 42
-
-

-