Dead Oak Removal

Tr33Climb3r

Participating member
Location
Wisconsin
Hey guys,

I have another video from this weekend. This tree was a lot of fun because I let everything fly. More description of the job below the video in YouTube. Music is a YouTube special so Mobile Users should be able to view it.

Sorry if I post too many videos...I enjoy making them and I hope you get some enjoyment out of watching them.

This one was shot in 720p

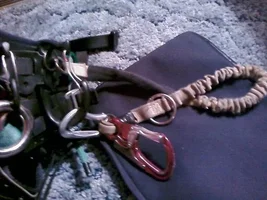
Oh, and when I install the pulleySAVER you can see the twisting motion on the small red clip. There was a question about this that came up here on treebuzz.

http://www.youtube.com/watch?v=fiiCc5HuC...mp;feature=plcp
 
Thanks everyone

[ QUOTE ]
Good show, looked cold.

[/ QUOTE ]

Thanks, Yea it was colder that day. Didn't really feel it until we were putting gear away at the end of the day.


[ QUOTE ]
Nice Vid. Your 200 is soooo shinny!! What are you using for a saw lanyard?

[/ QUOTE ]

Thanks, Yea the 200T is still fairly new. I pretty much just use it on the weekends right now.

The saw lanyard that I use is just a break away one that you can get pretty much anywhere. It is setup like Mark Chisholm's saw lanyard. I took the idea from him. Here is a picture of it...

307828-sawlanyard.jpg
 

Attachments

  • 307828-sawlanyard.webp
    307828-sawlanyard.webp
    39.4 KB · Views: 23
Lookin good, Casey. You seem real comfortable up there. Might I suggest you get into the habit of making your face cut a bit different...start with the top cut, which allows you to eye through the kerf when coming in on the bottom cut. Does that make any sense? And maybe limit the single pass cuts...please forgive me if I'm overly criticizing. You doing a great job!
 
[ QUOTE ]
Might I suggest you get into the habit of making your face cut a bit different...start with the top cut, which allows you to eye through the kerf when coming in on the bottom cut. Does that make any sense? And maybe limit the single pass cuts...please forgive me if I'm overly criticizing. You doing a great job!

[/ QUOTE ]

Not to sure on what you mean with the first part?
confused.gif


I know what you mean with the single pass cuts. I usually don't do them unless they are smaller pieces and have a lean. Or if I am flushing it off the stem.

Nah man don't worry about it! There is always room for improvement and part of the reason I post them is for people to find those little things and improve upon them.

Thanks

Changed your name on here from etree to oceans?
 
Yup, etree to oceans. I felt so "tree'd" out...

Let's say a normal felling is done with 3 cuts...2 for the face, 1 for the back cut. This refers to the face cut only.

So, the face cut;

Hold your saw at the angle you want the 'top' of the face cut to be and make that cut first. Make the 'bottom' cut next, and you can watch the saw chain as it approaches the hinge point by eyeing through the kerf of the first cut with total safety. You will eliminate any bypass cuts while creating the hinge since you'll know exactly when to stop the bottom cut. You will find that your hinge will meet with more accuracy and consistency. Ya know, like a ninja!

I hope this helps. I can try to make a quick video, but it would be tough without a helmet cam. Santa must have gotten my request too late.
 
[ QUOTE ]
Yup, etree to oceans. I felt so "tree'd" out...

Let's say a normal felling is done with 3 cuts...2 for the face, 1 for the back cut. This refers to the face cut only.

So, the face cut;

Hold your saw at the angle you want the 'top' of the face cut to be and make that cut first. Make the 'bottom' cut next, and you can watch the saw chain as it approaches the hinge point by eyeing through the kerf of the first cut with total safety. You will eliminate any bypass cuts while creating the hinge since you'll know exactly when to stop the bottom cut. You will find that your hinge will meet with more accuracy and consistency. Ya know, like a ninja!

I hope this helps. I can try to make a quick video, but it would be tough without a helmet cam. Santa must have gotten my request too late.

[/ QUOTE ]

Ok I got cha. I do what you say with traditional and open faced notches. The ones that I was using in the video was the humboldt notch. Breaks sooner to allow the piece to land flat if it doesn't get hung up like some of them did in the video. Also from what I remember using an open faced notch while cutting out the top and it holding for such a long time can cause the stem to fling back with you on it. My thinking may be wrong but I can picture it in my head.

I will try your technique for lining up notches.

Thanks
 
[ QUOTE ]
Thank you for posting a video without unnecessarly one handing every single cut. I didn't cringe once.
applaudit.gif


[/ QUOTE ]

Hey thanks Jamin

jamminz.gif
 
I get your point there, Casey. I think it's great that you have that understanding of which notch to use, and when, and why. It sure would be tough to align one's eye through the top of a Humboldt! As I watched again, it was more evident that the tops were long enough to have a decent amount of influence on stem movement after the bending moment.

Well, enough of that...like I said, keep up the good work, Casey!
 
Yea man I do appreciate the tip though for lining up the notch. I will keep the idea in my head and store it for later use.

Thanks again
 

New threads New posts

Back
Top Bottom