PTO shaft into Model 90

The shaft doesn't have a special way of aligning. It's just like the end in the illustration. The red arrow shows how simple ours is.

The weird thing is, we changed the throw out bearing in the fall. We had no issue aligning it and putting it in. It just simply went in with no problem.

312694-shaft.jpg
 

Attachments

  • 312694-shaft.webp
    312694-shaft.webp
    22.9 KB · Views: 29
Here is a photo to show my issue a little better. We were running out of day light...

But, the arrow pointing left shows how there is a gap when trying to push the PTO up to the bell housing of the clutch. It simply won't go in.

The arrow pointing down is a temporary spacer. We were trying to screw it into place, but it wasn't working as well.


312695-PTO.jpg
 

Attachments

  • 312695-PTO.webp
    312695-PTO.webp
    28.3 KB · Views: 21
Have you run the chipper since you replace the throw out bearin in the fall?

What have you done in between?

Its been a while since I was inside a bellhousing. I do remember the challenge of keeping the clutch disc aligned while I put the whole works together. There is a vague memory of using a dowel in place of the splined end of the driveshaft to align everything while I snugged up the bolts on the bell housing.

The clutch disc may have slipped out of alignment during reassembly.
 
As Tom said, things may have settled. You can buy a clutch alignment tool to realign things. A dowel similar in size to the shaft will do the trick usually.
 
Yes, the disk.

If I'm thinking correctly, that would spin the shaft and possibly align it better. Or like Tom said the disc may have dropped down.
 
That may be the lead I'm looking for guys.

By visual inspection, the clutch looked off to us, but I had no real way to validate that. After some time of trying over and over again, I was thinking my eyes were going bad.

But, I'll try that tomorrow.
 
When I was in college my part time job was at a company that built abrasive belt sanding machines. While I was there I learned sooo much about machinery and the nuts and bolts of assembly.

Here's something to try that applies to anything that attaches with more than on bolt/screw.

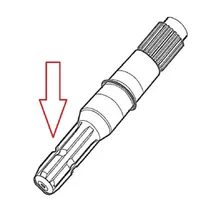
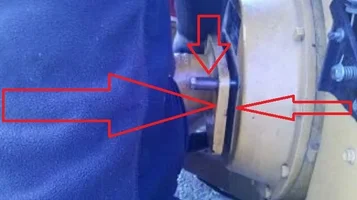
Get everything aligned and test fitted. In your case you'll need some sort of alignment tool, dowel, pto shaft or even a half inch socket drive extension. Install the screws that hold the bell housing starting at noon, no you don't have to wait until lunch time...then go to the opposite and work around in the same direction. Just finger tight at first. Check alignments. Now, snug up the screws the same amount using the same pattern. Check to see if the clutch plate is still aligned as you go. Do this in stages until its time to torque the bell housing screws.

One time I had to keep a shim plate aligned with the base of an assembly. think of a metal gasket. To keep the two aligned I used string tied through the bolt holes to keep them aligned. Once I got all of the bolts started finger tight I snipped the strings.

Have fun!
 
We had to take off the bell housing because we simply couldn't align everything. We discovered a ceased "pilot bearing."
bigeyes.gif


The bearing had been ceased and broken for a while too. Unbelieveable! That could have been worse in the long run.

And for good measure, we bought a new clutch disk.
 

New threads New posts

Kask Stihl NORTHEASTERN Arborists Wesspur TreeStuff.com Teufelberger Westminster X-Rigging Teufelberger
Back
Top Bottom